
Cascading Style Sheet Tutorial – Part 2
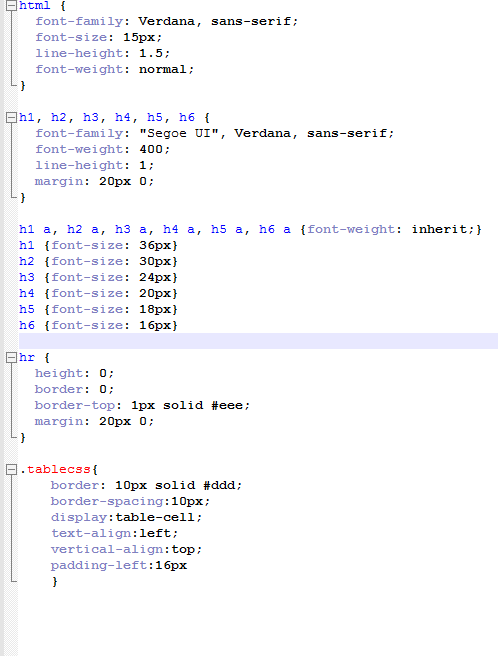
As we read in the last part of the tutorial that there are 2 ways to style your html page. First one was styling each tag separately and 2nd was putting the style tag in <head> tag of every html file in your website. But putting style tag in head in each page of your website can also cause the code redundancy which is tough to maintain and if any change come we have to make modification in all of the pages. To solve this we can create .css file for our website where we can list down all the styles we want to implement in our website. Below is the sample .css file :
To use this CSS file in each of the page in website we have to use link tag as below:
<link href=”stylesheet.css” rel=”stylesheet”>
stylesheet.css is the name of the your css file.
To jot down below are the ways we might want to style our webpages:
- If we want to style a particular tag one time in page we may style it at tag level
- If we want to put some styling at page level , we can put it in <style> tag in head section
- If we want to create common layout in out website, we should do it in CSS files.
So this was all about the ways you one can do styling the website. Now lets learn at the very basic level about the attributes and properties of various tags which you can set in the style sheets or tag:
Color: This is very basic property which we can set with any tag telling what should be color of the tag. e.g
p { color : black} OR
p{ color : #000000} OR
p {color: rgb(0,0,0)} OR
p { color: hsl(0, 0%, 0%)}
Above are mentioned 4 different ways we can color the text/background etc in the website.
First one is named colors, 2nd is hex code for the color, 3rd is rgb (red,green,blue as per intensity) and 4th is HSL i.e. hue, saturation and lightness. For further about colors , you can read at https://www.w3schools.com/colors/colors_hsl.asp
